Custom fabric printing
Printing your own fabric can be a fun and creative way to customise your projects, by either adding Skzoo details to your fabric or matching to Stray Kids clothing. Here are 3 ways you can print your own fabric!

Online Fabric Printing
Easy peasy custom fabric printing - a digital fabric printing service.
Online fabric printers
If I need to print a large area, I will use an online printing company to print fabric by the metre. My favourite company to use is Woven Monkey, but there are lots of others out there.
They are simple to use
Choose Your Design - Use your favourite design software such as Canva to create a design, Considering the theme, colours, and scale of your design. Make sure to use the recommended dimensions provided for optimal results.
Or Select a Ready Made Design - Sites like WovenMonkey / Spoonflower have thousands of designs uploaded by designers from all over the world for your to choose from.
Prepare Your File - Once your design is ready, save it in a high-resolution format (like JPEG or PNG) to ensure quality when printed. Most online printers suggests a resolution of at least 150 DPI for the best outcome.
Select Your Fabric Type - you can choose to have your design printed on a wide of fabrics. Most sites offer a fabric guide and the option to buy fabric samples before you order your custom print.
Choose a Layout - Decide how you want your design to repeat on the fabric: as a basic repeat, half drop, or in a custom layout. This lets you decide how your pattern will stand out. You can adjust the size and placement of your design, ensuring it fits perfectly onto the fabric. Take your time with this step—playing with scale and layout can lead to exciting results!
Preview Your Fabric - Before placing your order, view a digital mock-up of your design on the fabric selected. This will help you spot any last-minute adjustments needed to achieve your desired look.
Place Your Order - Once you’re satisfied with your design and settings, simply follow the prompts to place your order! Sit back and await your custom fabric to arrive.
Tips for Success
Order a Swatch: If you’re trying a new design or fabric, order a swatch first to see how it looks and feels in person.
Play with Scale: Experiment with different sizes of your design to see what works best.
Inspiration: Browse the marketplace to gather ideas and inspiration from other designers.

Paper-backed fabric for use with inkjet printers
Photo Printable Fabric
If you have access to an inkjet printer at home, then you can use printable fabric sheets to print using regular printer ink.
Design Your Image - Create your design using your preferred software, such as Photoshop, Canva, or any other graphic design tool. Make sure your design matches the size of the photo printable fabric sheets you are using.
Test Your Printer Settings - Before printing on your fabric, run a test print on regular paper. Adjust the printer settings to ensure the best quality, typically using “photo” or “high-quality” settings.
Print Your Design - Load the photo printable fabric sheet into your printer, ensuring it’s oriented correctly - it will have a specific side for printing. Print your design, and let it dry completely before proceeding.
Remove the paper - Peel the paper backing away from the fabric and rinse under water for 30 seconds.
Dry and iron - Blot with a towel and leave to dry. Once dry, press with an iron from the backside.
Get sewing - You can now sew with your fabric like any other fabric.
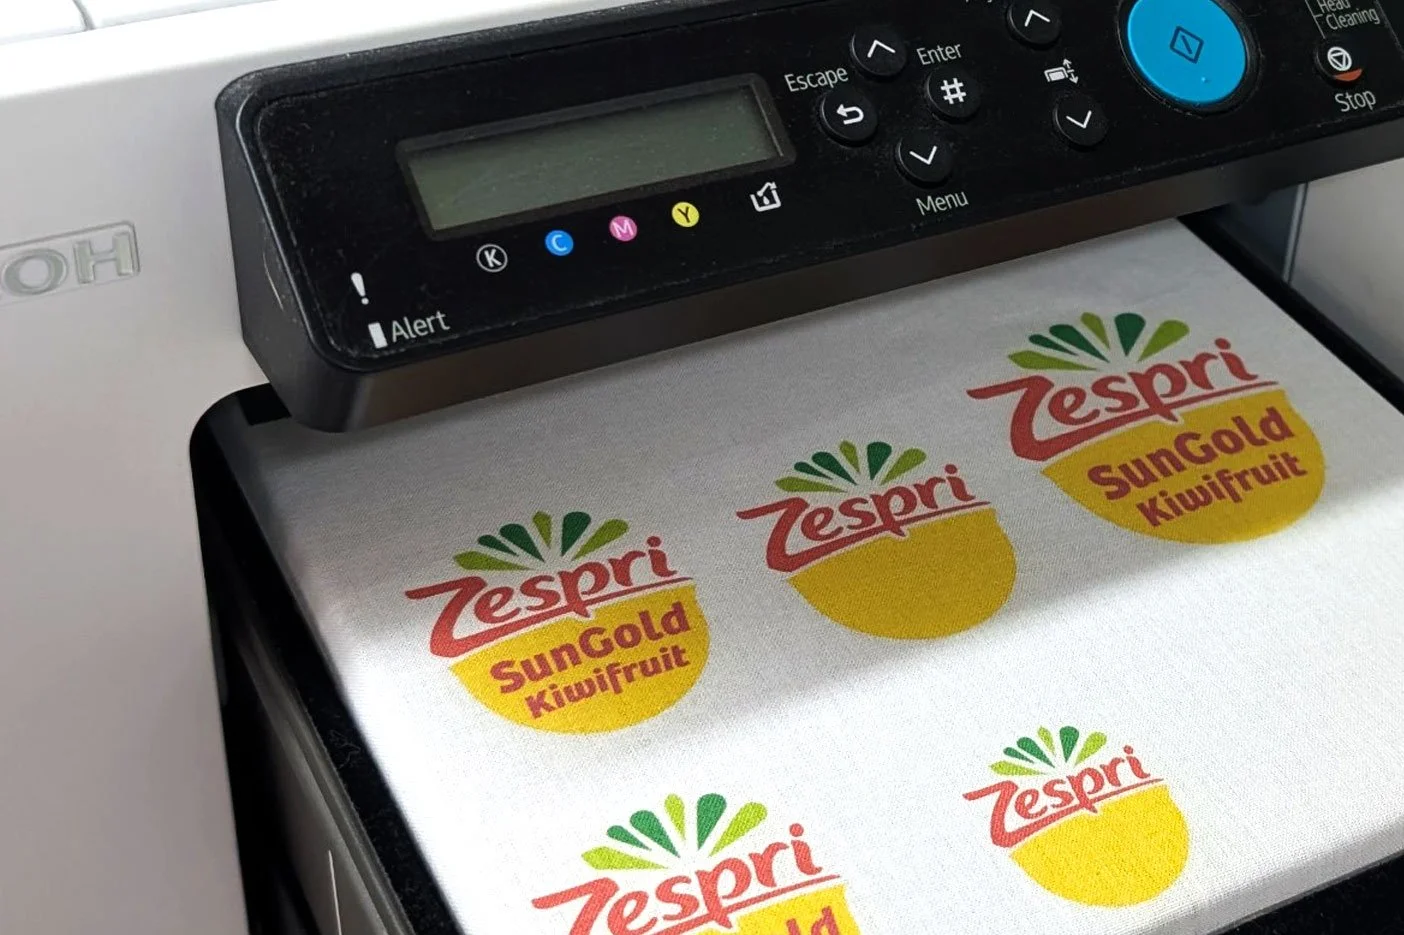
DTG fabric printer
Prints designs and photographs directly onto garments or fabric using state-of-the-art inkjet technology.
Direct-to-Garment Printing
A direct-to-garment (DTG) printer is a fantastic way to create custom fabric designs. The process is simple, fun, and worth the expense if you are printing lots of custom designs.
Design Your Image - Create your design using your preferred software, such as Photoshop, Canva, or any other graphic design tool. Ensure your artwork is in the correct format and resolution, typically a minimum of 300 DPI for best results.
Select Your fabric - Cotton or cotton-blend fabrics work best.
Load the fabric - Open the platen of the printer and place the fabric on it, ensuring the fabric is clean and wrinkle-free for optimal printing.
Adjust Print Settings - Open your printer software and select the correct print settings for your design and garment type.
Print a Test - If it's your first print, consider running a test print on a scrap piece of fabric or paper to check colours and alignment.
Print Your Design - Send your design to the printer from your software, monitor the printing progress to ensure everything is functioning smoothly.
Cure the Ink - Once printing is complete, you need to cure the ink. Use a heat press or curing oven as recommended by the printer guidelines.
Finishing Touches - After curing, remove the garment from the platen and let it cool.
Sew - Your fabric is now ready to use.
Other posts you might like
〰️
Other posts you might like 〰️


To put a sewing pattern onto fabric, you can use a few different methods. I like to swap between these methods depending on the pattern design.